Making Pizza at Home: Tips from Professional Chefs
There's something deeply satisfying about creating your own pizza from scratch. While ordering from Apache Pizza guarantees consistent, professional results, we understand the appeal of homemade pizza—the creative process, the aroma filling your kitchen, the pride of serving something you've made yourself. Our professional chefs are sharing their insider tips to help you achieve restaurant-quality results in your home kitchen.
Understanding Home Oven Limitations
The biggest challenge in home pizza making is temperature. Professional pizza ovens reach 400-500°C, creating the rapid cooking and characteristic charring that defines great pizza. Most home ovens max out around 250°C, which significantly impacts results.
Don't let this discourage you—excellent pizza is absolutely possible in home ovens with proper technique. The key is understanding how to work within these limitations. You'll need slightly longer cooking times and different techniques to achieve crispy crusts and properly melted cheese.
Consider investing in a pizza stone or steel. These tools absorb and radiate heat, effectively creating a hotter cooking surface that better mimics professional ovens. Preheat your stone or steel for at least 45 minutes before baking to ensure it's thoroughly heated. This single investment dramatically improves home pizza quality.
Simplified Dough for Home Bakers
While our earlier article covered professional dough techniques, home bakers benefit from a simplified approach. Here's a reliable recipe that doesn't require special equipment: combine 500g bread flour, 325ml warm water, 10g salt, 7g instant yeast, and 15ml olive oil.
Mix ingredients until combined, then knead for 8-10 minutes until smooth and elastic. You can do this by hand or with a stand mixer. The dough should be slightly sticky but manageable. Place it in an oiled bowl, cover, and let it rise at room temperature for 1-2 hours until doubled.
For better flavor, use the refrigerator method: after the initial rise, refrigerate the dough for 24-72 hours. This slow fermentation develops complex flavors similar to professional dough. Remove it from the refrigerator 1-2 hours before shaping to allow it to warm up.
Divide the dough into portions (this recipe makes 2-3 pizzas depending on size) and shape into balls. Let them rest for 30 minutes before stretching. This rest period relaxes the gluten, making the dough easier to work with and preventing it from shrinking back.
The Art of Stretching Dough
Stretching pizza dough intimidates many home cooks, but it's actually quite forgiving with practice. Start by pressing the dough ball flat with your fingertips, leaving a slightly thicker border for the crust. This initial pressing creates the foundation for stretching.
Pick up the dough and let gravity help—hold it by the edges and rotate it, allowing the weight to stretch the center. This technique is gentler than aggressive pulling and creates more even thickness. Avoid using a rolling pin, which deflates the air bubbles you've carefully developed during fermentation.
If the dough resists stretching and keeps springing back, let it rest for 10 minutes. This allows the gluten to relax, making it much easier to shape. Don't worry about achieving perfect circles—rustic, irregular shapes have their own charm and taste just as good.
Aim for dough about 3-4mm thick in the center, slightly thicker at the edges. Too thin and it won't support toppings; too thick and it won't cook properly. Remember, dough shrinks slightly when you add toppings and transfer it to the oven, so stretch it slightly larger than your desired final size.
Sauce Fundamentals
Great pizza sauce doesn't require cooking. In fact, the best approach is often the simplest: quality canned tomatoes, crushed by hand or briefly blended, seasoned with salt, a touch of olive oil, and perhaps some dried oregano or fresh basil.
Use San Marzano tomatoes if possible—their sweet, low-acid flavor is perfect for pizza. Crush them by hand for rustic texture or pulse briefly in a food processor for smoother sauce. Season conservatively at first; you can always add more, but you can't remove excess salt.
The raw sauce cooks on the pizza in the oven, developing concentrated tomato flavor. Pre-cooking the sauce actually works against you by reducing moisture content too much and creating overly intense flavor. Keep it simple and let the oven do the work.
Apply sauce sparingly—a common mistake is using too much, which creates soggy pizza. Use about 60-80ml of sauce per pizza, spreading it thinly and leaving the outer edge bare for crust. The sauce should enhance, not drown, other flavors.
Cheese Selection and Application
Mozzarella is the classic pizza cheese for good reason—its mild flavor and excellent melting properties work perfectly. For home pizza, low-moisture mozzarella is generally more reliable than fresh mozzarella, which releases too much water during baking.
Shred cheese yourself rather than using pre-shredded varieties. Pre-shredded cheese contains anti-caking agents that prevent proper melting. A box grater or food processor makes quick work of shredding, and the superior results justify the minimal extra effort.
Don't overload your pizza with cheese. About 100-150g for a 12-inch pizza is sufficient. Too much cheese creates a greasy, heavy result and can prevent the crust from crisping properly. Distribute it evenly, leaving space for sauce and toppings to shine through.
Consider combining cheeses for more complex flavor. A little Parmesan adds sharp, salty notes; provolone contributes tanginess; fontina brings creaminess. These supporting cheeses shouldn't dominate—use mozzarella as your base with 10-20% other varieties mixed in.
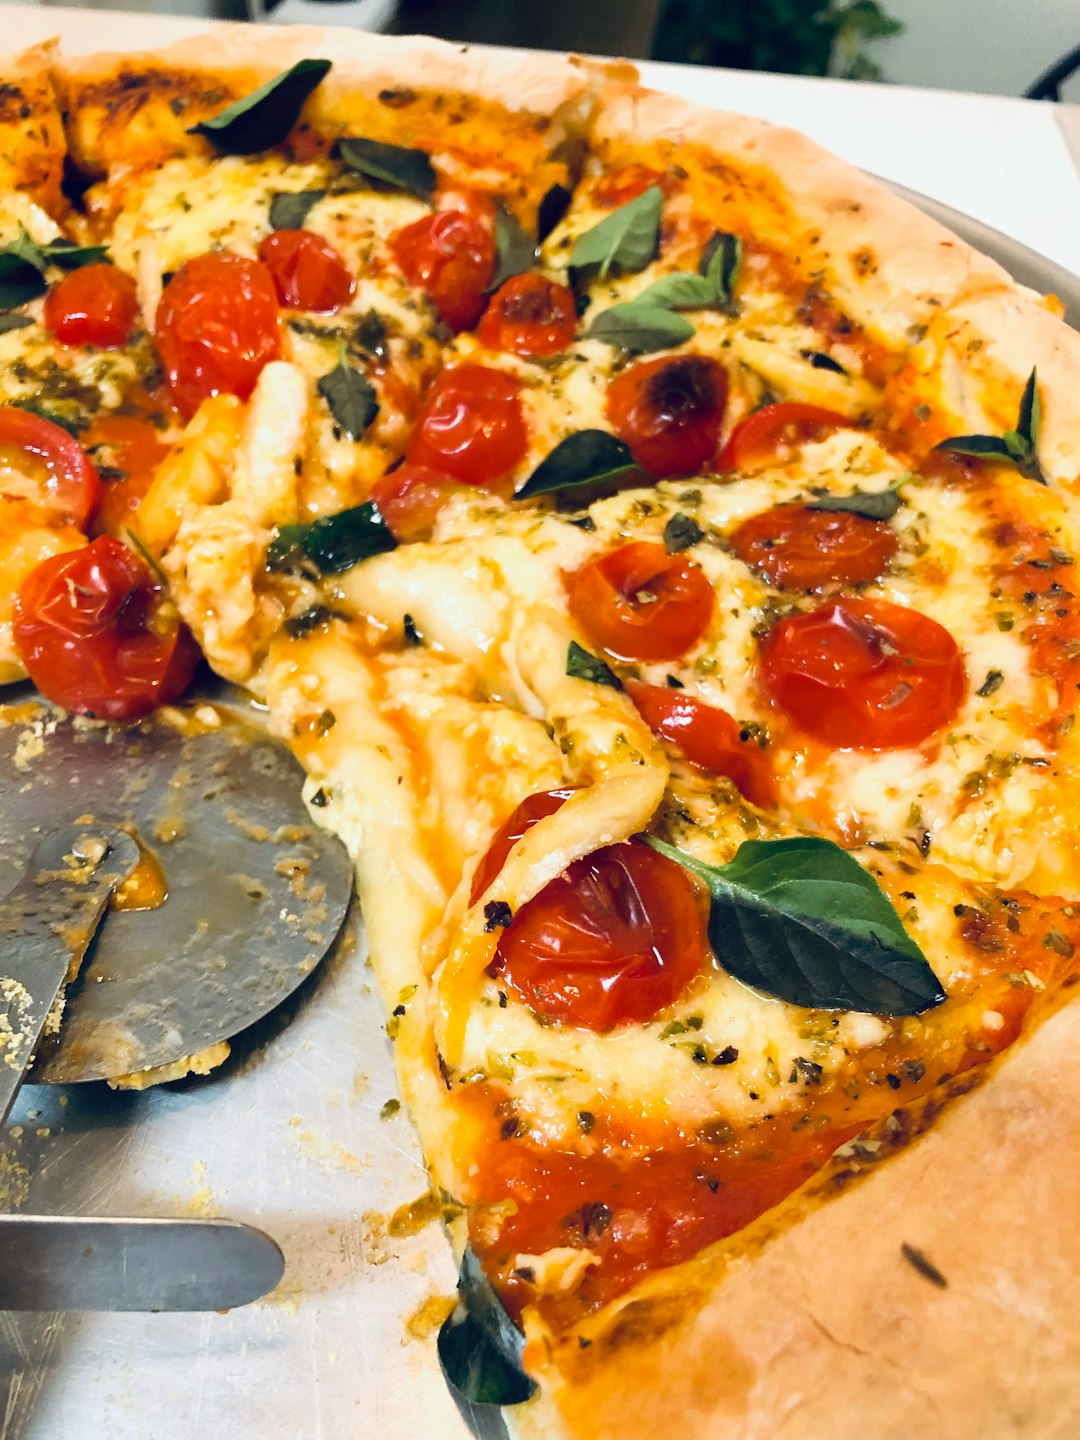
Topping Strategy
The cardinal rule of pizza toppings is restraint. Professional pizzaiolos know that less is more—overloading creates soggy, unevenly cooked pizza. Choose 2-4 toppings maximum and use them sparingly. Each ingredient should be identifiable and contribute to the overall composition.
Prep your toppings appropriately. Vegetables with high water content like mushrooms or peppers benefit from quick sautéing to remove excess moisture. Meats should be pre-cooked—raw meat won't fully cook in the short pizza baking time. Slice everything thinly for even distribution and proper cooking.
Layer strategically: sauce first, then cheese, then toppings. This order prevents toppings from burning while allowing them to nestle into the cheese. Delicate ingredients like fresh basil or arugula should be added after baking to preserve their fresh, vibrant character.
Consider flavor balance: salty (olives, anchovies), sweet (caramelized onions), spicy (jalapeños), and umami (mushrooms) elements should complement rather than compete. If using strong flavors like blue cheese or spicy sausage, use them as accents rather than main components.
Baking Technique
Preheat your oven to its maximum temperature—usually 250-260°C—for at least 45 minutes with your pizza stone or steel inside. This extended preheat ensures everything is thoroughly heated for best results. Position the stone on the lowest oven rack for crispier bottom crust.
Assemble your pizza on parchment paper or a well-floured pizza peel. The parchment paper method is more forgiving for beginners—you can slide the entire sheet with pizza onto the stone, then carefully remove the paper after 2-3 minutes when the bottom has set.
Baking time typically ranges from 8-12 minutes depending on your oven and pizza thickness. Watch for visual cues: the crust should be golden brown with some darker spots, the cheese fully melted and beginning to brown, and the bottom crispy when you lift an edge with a spatula.
If your oven has a broiler setting, consider finishing the pizza under the broiler for 1-2 minutes. This adds color and char to the top while the bottom finishes crisping. Watch carefully—broilers are intense and can quickly burn your pizza.
Troubleshooting Common Issues
Soggy crust often results from too much sauce, wet toppings, or insufficient oven heat. Use less sauce, pre-cook watery vegetables, and ensure your oven and stone are fully preheated. Consider par-baking the crust for 3-4 minutes before adding toppings.
If your dough won't stretch or keeps shrinking back, it needs more rest time. The gluten is too tight and requires relaxation. Cover the dough and wait 10-15 minutes before trying again. Forcing it will only create uneven thickness and potential tears.
Burnt edges while the center remains undercooked indicates oven hot spots or temperature that's too high. Try positioning the pizza differently in the oven, or reduce temperature slightly and extend cooking time. Rotating the pizza halfway through baking also helps achieve even cooking.
Toppings sliding off suggests too much sauce or cheese acting as a slippery layer. Apply sauce and cheese more sparingly, and ensure toppings are distributed evenly and pressed gently into the cheese to help them adhere.
Creative Variations to Try
Once you've mastered basic technique, experiment with interesting variations. Try a white pizza with ricotta, mozzarella, garlic, and spinach. Create a breakfast pizza with scrambled eggs, bacon, and cheddar after baking. Explore dessert pizzas with Nutella, bananas, and strawberries.
Different dough styles offer variety too. Add whole wheat flour for nuttier flavor and more nutrition. Incorporate herbs like rosemary or oregano directly into the dough. Try a sourdough pizza crust if you maintain a starter—the tangy flavor adds wonderful complexity.
Regional pizza styles provide inspiration: try thin, cracker-like Roman style, thick and fluffy Sicilian, or folded calzones. Each style has unique characteristics and techniques, offering endless opportunities for exploration and skill development.
Making Pizza Night Special
Transform home pizza making into an event. Set up a topping bar and let family or guests customize their own pizzas. This interactive approach makes cooking communal and fun while accommodating different preferences and dietary restrictions.
Prepare dough in advance and refrigerate it, making pizza night less stressful. With dough ready, you can focus on toppings and the fun part of assembly. Consider making extra dough to freeze—it keeps for up to three months and thaws overnight in the refrigerator.
Create a complete Italian experience with a simple salad, good bread, and wine. The pizza doesn't have to carry the entire meal. Side dishes and beverages elevate the experience and make it feel more like dining out.
When to Order Instead
Despite the satisfaction of homemade pizza, sometimes ordering is the better choice. When you're tired, short on time, or simply don't feel like cooking, Apache Pizza delivers restaurant-quality results without any effort on your part.
There's no shame in enjoying both homemade and delivered pizza. Each has its place—homemade for the joy of creation and customization, delivered for convenience and consistent professional quality. The best approach is appreciating both options for what they offer.
Not in the Mood to Cook?
Let Apache Pizza handle dinner tonight. We'll deliver restaurant-quality pizza to your door with no mess and no stress.
Order Now